I know I mentioned in my last post that I am a details person...so I going to try and give as much detail as I can with this tutorial and I hope that will help with any confusion!
Here we go...
Materials needed:
Fabric. After reading through Super Jenn's post and the comments I learned that she bought a half a yard of fleece for the kids pillows and a full yard for her own (this will be a little bigger). So that is what I did with the girl in toe. We headed to Joanne Fabrics and picked out the prettiest (in her opinion) pink girly fabric and the greatest blue sharp print that we could for the boy. There was a great selection for the adult pillow but I found something...
Pillow case. I used an old pillow case that I had laying around (made sure it was a light color because I didn't want it to show through the pink fleece). I think it was a standard queen pillow case.
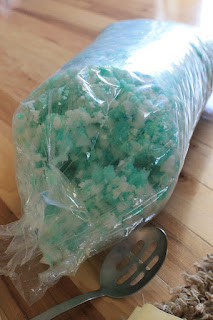
Foam. Joanne's had pretty good size bags sitting in the back with all the regular foam...and be ready, this stuff is a MESS!!
Sewing machine and the such
Instructions:
Step one: cut the pillow case into sections. Lay the pillowcase length wise and cut it. Jenn's measurements were 24 inches x 6 inches...I decided to cut mine a little bigger (forgot I did this...)
Detail...so here was my first hiccup. I wasn't sure how to cut this pillowcase and make them into long tube like pillows. This may not be a problem for anyone else, but if you remember my previous post...I was working on little sleep and lots of distractions. So I had to stand back and see that if I cut from the cuff (the opening) of the pillow I would get the long pillows.
{the cuff is where the rotary cutter is sitting}
So I cut two strips about 6 1/2 inches-7 inches...the left over is the one that I made for the adults! Step 2: Flip them inside out, pin in place, and sew up all open long sides. (the one on the left will only needs the cut side sewn and the middle one needs two sides sewn) Leave the cuff open to fill with the foam. Flip the pillowcase right side out.
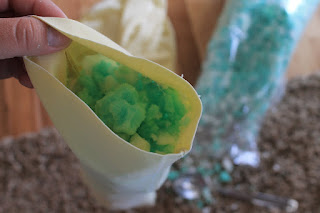
Step 3: Fill with the shredded foam...warning this is going to be messy! I used a large kitchen serving spoon to get the foam down all the way to the bottom of the cases.
Keep stuffing....
and stuffing....
until it is all the way to the top!
Step 4: I folded the top of the pillow over, pinned it closed, and sew a straight line across...
And, for me the easy part was over.
Step 5: Begin the cover for the pillow...this will be a soft snuggly and the part that will attach to your seatbelt. This is where the lack of sleep and distractions became an issue.
I didn't read the directions by Super Jenn very well so I just took my fabric and laid it on my cutting board under the pillow to see how much I would need. I folded it half and cut it down the middle. This gave me two peices...(so I should have remembered that I cut the pillow case somewhere between 6 and a half inches and 7 inches...that way I would have known to cut the panels around 9 inches wide..but lack of sleep and distractions!)
Step 6: The directions by Super Jenn said to cut four 6x6 inch squares (again if I remembered that I cut the pillowcase bigger than her orginal measurements I would have made these bigger, but I didn't). But I did cut the squares and folded them with the right side out and sewed along the short sides of each of them. I call them tabs now.
Now this is where I got caught again...I couldn't tell from Super Jenn's post where to put the tabs. I origanlly put two of them together between the seams...when I looked at it I just couldn't figure out how it was going to attach to the seatbelt and hold it in place. Well, after sewing both side of the case I realized...I did it wrong!
And I sat for an hour using a seam ripper to take it all apart!
So I took a breath! and layed out all of the pieces...
Step 7: First lay down one of the long panels with the right side facing you.
Next lay the tabs on top of the first panel...two of them on each side spaced about three inches apart with the unsewed long side matching the panel's raw edge. And match the other two tabs across from the first two and line up the raw edges.
Hint: you may want to lay down the stuffed pillow you just finished next to the panels with the tabs on it. Make sure the tabs are close to the middle of the pillow. I made the mistake of putting them too close to an end with my second pillow. I will be fixing that.
Finally, lay the second panel face down on top with all the raw edges matching up and pin them in place. The tabs will be inside the panels, but don't worry you will be turning it inside out.
I'm so sorry that I didn't get a picture of this...frustration was mounting and I just wanted to get it done! Again, this step should have clued me into the fact that something was wrong...the tabs that are across from each other should have overlapped. This is where the velcro goes to attach to the seatbelt.
And I sewed the two sides with the tabs and one short side. The open side will be where the pillow will slide in.
Turn the cover inside out.
This is how it should look
Step 8: I cut a piece of velcro to size of the tabs...again matching the tabs on the top of the picture to the tabs on the bottom. The tabs will be overlapping so make sure you place the velcro like that. (see picture below of final product)
Pin them in place and sew...
Now just put your stuffed pillowcase in the cover and your almost done....
I had a bit of material and was trying to figure out how to close the end so the kids wouldn't mess with the pillow inside. For right now I just folded it inside of itself...
Notice how the tabs overlap!
I am planning on putting a button on it just so it stays closed, but that's it. This may be the longest post I have ever done but I just wanted to make sure I gave you as much detail as I needed to get this done.
Again if you can sew a straight line, and have a lot of patience, you can do this!
Confession...once I started my daughters, I got a little cocky and thought I was going to get it done in no time! Not a chance. I actually made the cover way too small and had to completely start over. At one point I put the whole project in a corner and gave myself a time out!
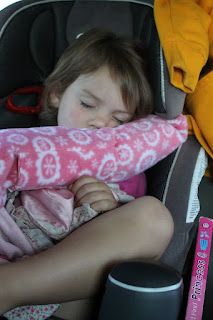
Once I was done I got to work and she ended up with a great one too!

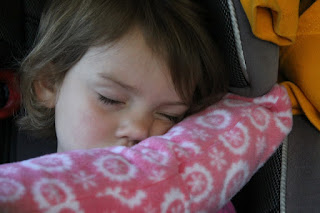
And so far they have been great to have...whether as a pillow or just something to cuddle with!
Hope this helped.
Check out Super Jenn here
I loved this idea and I hope my mistakes help your project go smoothly!


Thanks for your take on it! I was following super Jenn's tutorial, and totally got stuck on the tabs. I couldn't figure out what to do with them, and was frustrated :) I had everything sitting there, but now I have finished two of three, or almost. I still need velcro, but that should be easy! Thanks again :)
ReplyDeleteThanks Brook, I am so glad that my struggles helped you. It did get easier once I figured out the tabs! Hope you enjoy them!
Deletegreat tutorial had it made in less than an hour !!!!! turned out AMAZING Thank you
ReplyDeleteI am so glad it went smoothly for you!
Deletegreat tutorial! I can't sew anything to save my life, and despite seeing in my head what would likely be the process I still can't quite describe it... but I am passing this page along to my mother in law in the hopes that her magic with a sewing machine with your clear description will translate to something wonderful that the kiddos will use often :)
ReplyDeleteThanks for stopping by and thanks for the comment. I am a "whatever" for dummies type of person so I tried to write my tutorial as detailed as possible. However, I know those who aren't comfortable sewing still aren't going to be comfortable with it. Good luck to your mother in law and please post pictures when she finishes! I hope your kids enjoy!
DeleteThis comment has been removed by a blog administrator.
ReplyDeleteI have out that working with foam, if you put in a paper bag for awhile before you use it, this cut s down some of the static , then it's not as messy. Why can't you use the same kind of stuff you use in a pillow?
ReplyDelete